As a part of the final submission for the design studio, I was required to submit my design journal at the end of the semester. For this time, ‘journal’ meant an A5 sketchbook that has drawings for the project. Since I had drawings both on my A5 sketchbook and on the computer, I decided to digitise all drawings and create a simple, curated journal. As I ended up showing to some of my friends how I made the journal afterwards, I thought it’s worth writing an article on it 😉
(I’m sorry it’s so overdue… I first titled this article “quick and easy bookbinding…” but then I found it getting too long!)
1. Prepare all the materials on the computer
The first thing I did was to organise assets for the journal layout. I used the scanning function on Mac:
System Preference > Printers & Scanners > Scan > Open Scanner…
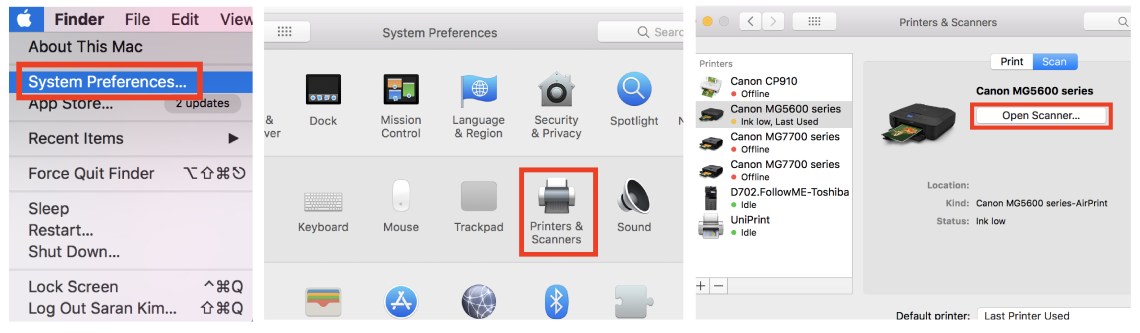
Make sure that the printer is on before opening the scanner panel. I used my home printer (with scanner function) Canon PIXMA MG5660 (the scanner quality is actually better than university MFP!). I scanned all pages of the A5 sketchbook that I wanted to include in the final journal using the text setting (Text, 300 dpi, PDF). As I had been drawing mainly using a 0.4 black pen (not pencil), the b/w setting rather than greyscale gave clear linework which I wanted. For coloured pages, I used the colour setting.
I made a ‘raw files’ folder on the computer nested under the ‘journal’ folder to keep files organised. After scanning drawings, I set this folder as the destination of ‘Save’. I also stored the duplicates of digital drawings (never move the original files from other assignment folders… it can affect other linked documents unless embedded).
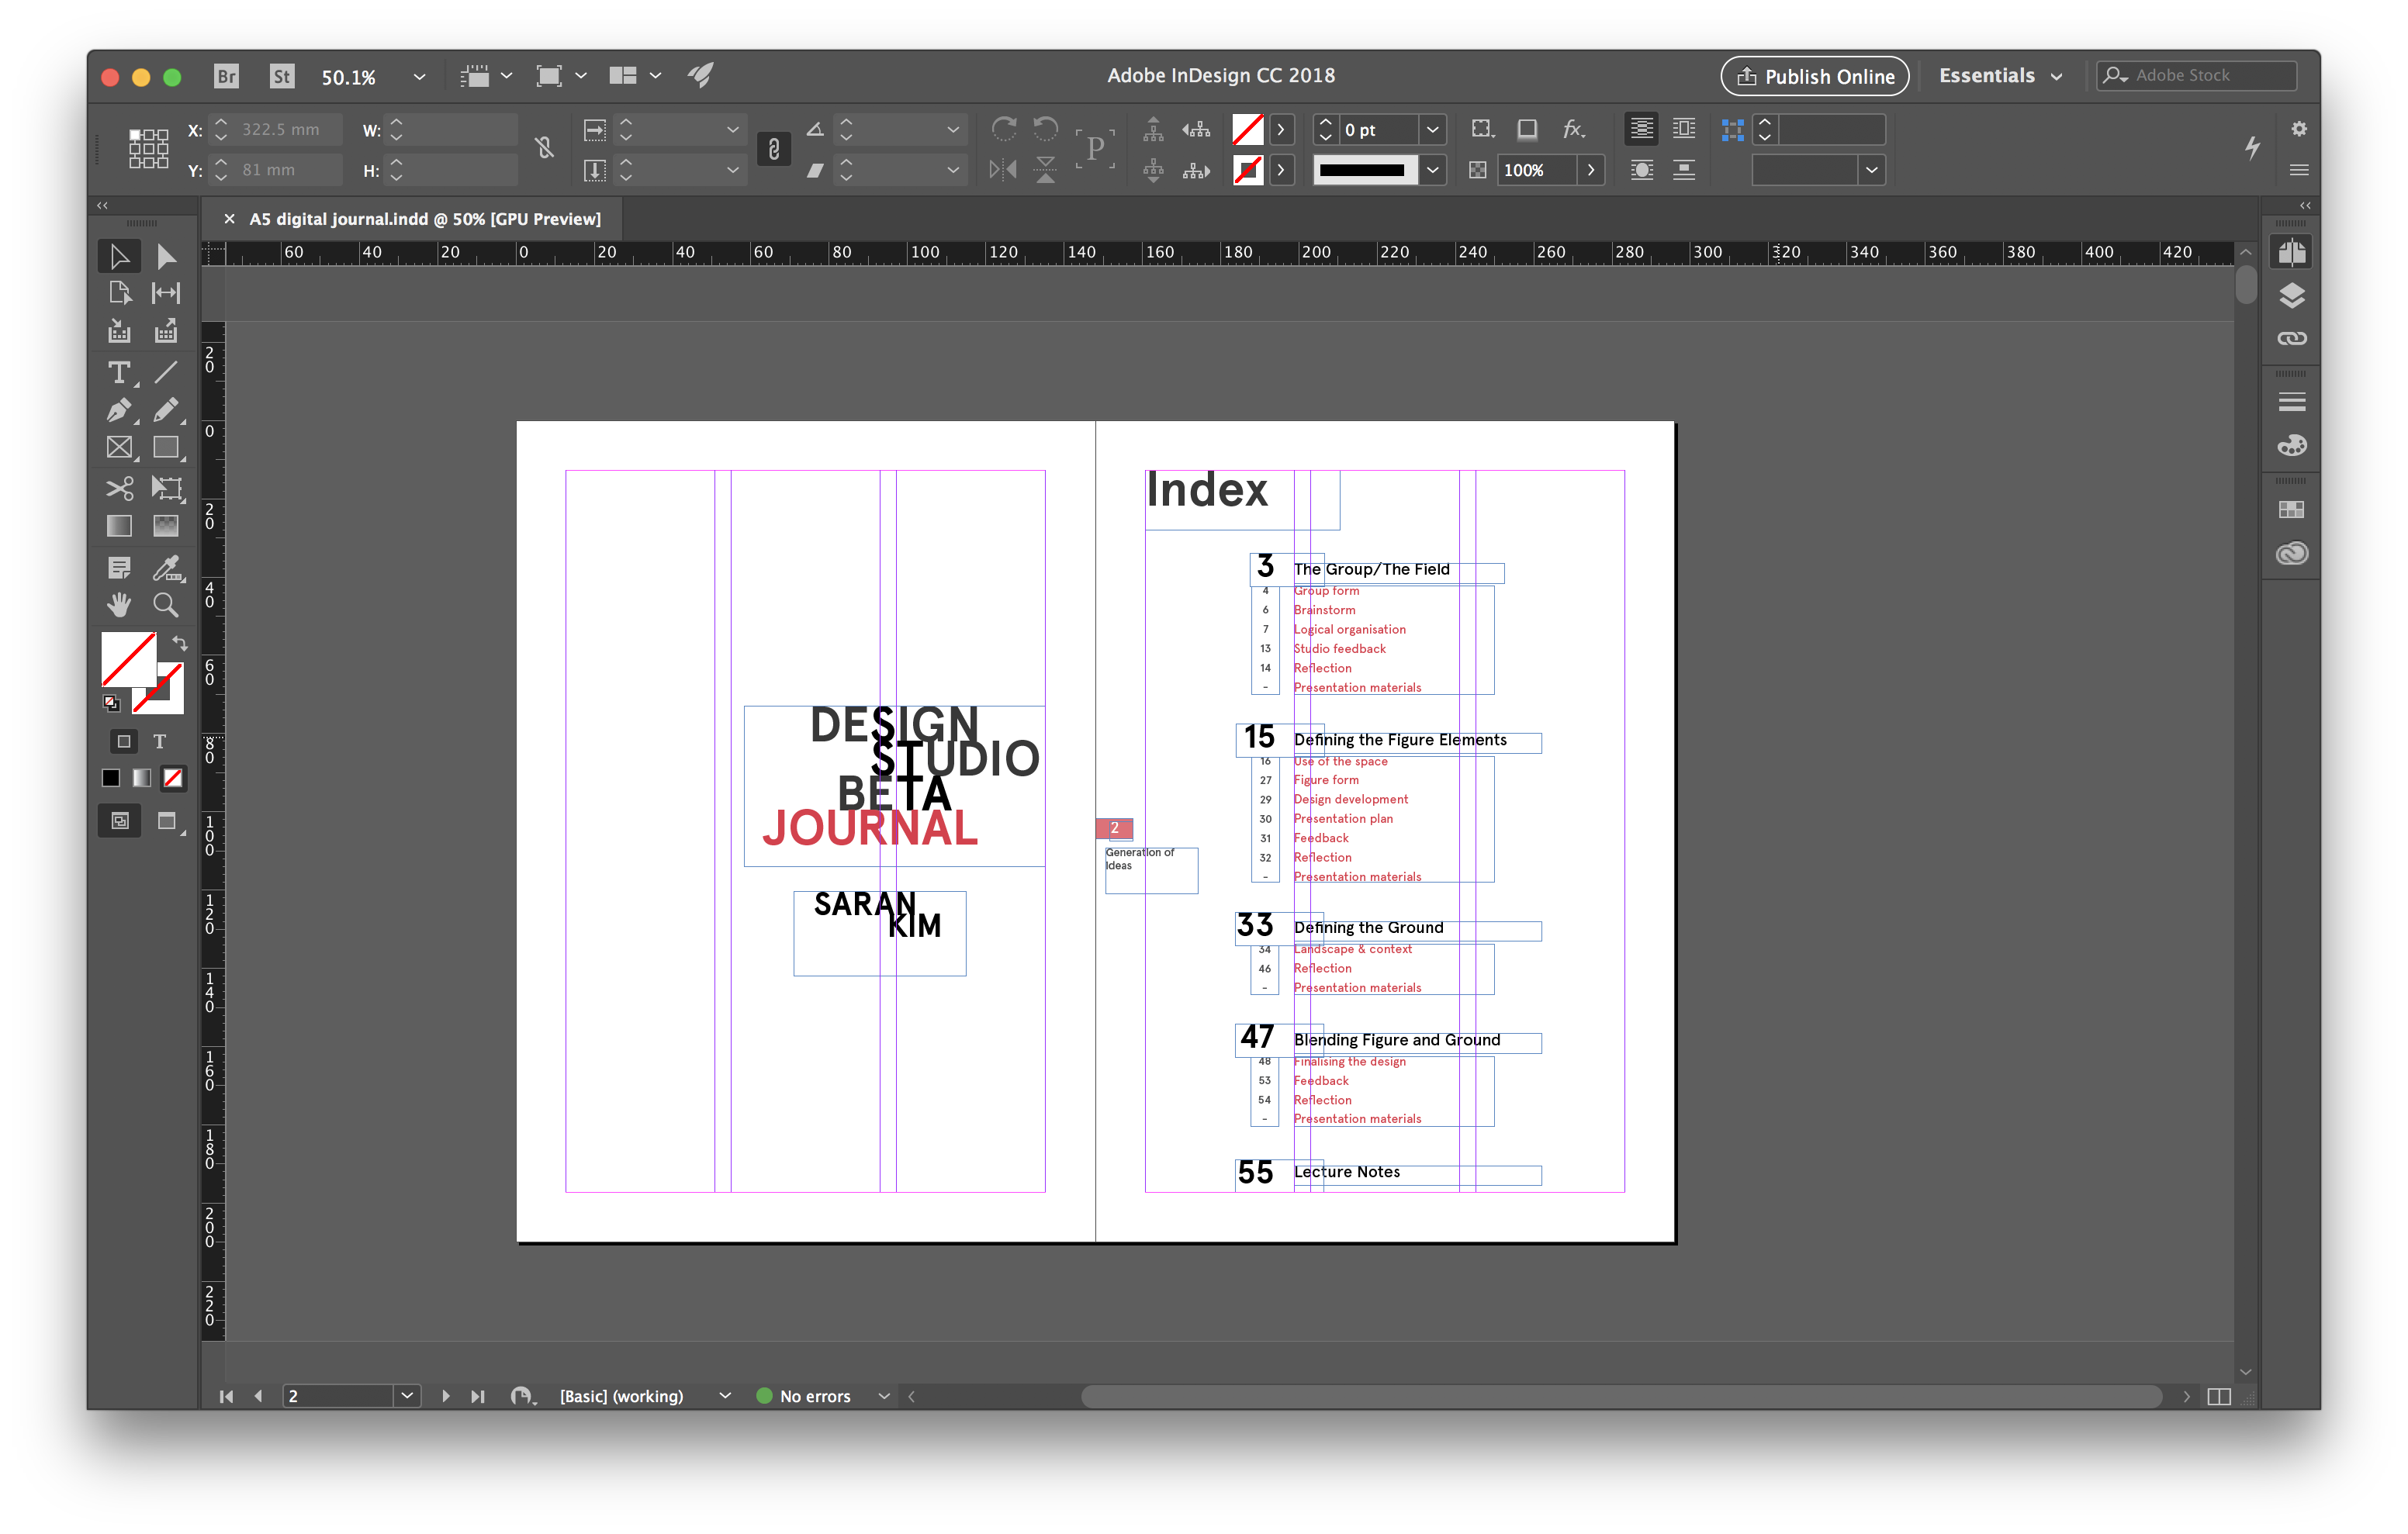
2. Create an Indesign layout

It is important that the basic layout of the journal is done before you start importing images. For the orientation and print size, consider how you will be printing; this time, I set it to be spread of two A5 pages (portrait), printed on A4 paper ( please refer to printing step below).

If your journal has chapters, I recommend you to use Masters (double-click Master pages, edit them and apply them to journal pages) for page numbers and chapter headings. You can insert page numbers by:
Create a text box, then Type > Insert Special Character > Markers > Current Page Number


To avoid any printing issues, I would recommend keeping all the important information 1-2cm off the vertical edges of the paper (UNLESS the image is over two pages… see below!)

If your layout has one large image over two pages (one spread), please make sure that it is split onto the right-hand side of one paper and the left-hand side of the next paper (see how page B and C are printed).
In terms of margin, you don’t need to intentionally create margin for the case of one large image over two pages (pages B-C) as we won’t be using threads for binding.
3. Printing
There are many different ways of printing pages for booklet/journal. You should choose the one that is appropriate for how you want to bind. This time, I wanted to keep it simple so I decided to fold one A4 page in half for two A5 pages (no double-sided) and the edges of the paper to be fixed on the spine of the book.

I printed pages single-sided, two pages (one spread) per A4 sheet. Click ‘Page Setup…’ and ‘Printer…’ to open two panels above.
This article focused on the steps for preparing to bind a book. On the next article, I’m going to talk about the simple bookbinding steps 🙂


1 Comment